Computeractive
How to... control a pc remotely for free with hoptodesk
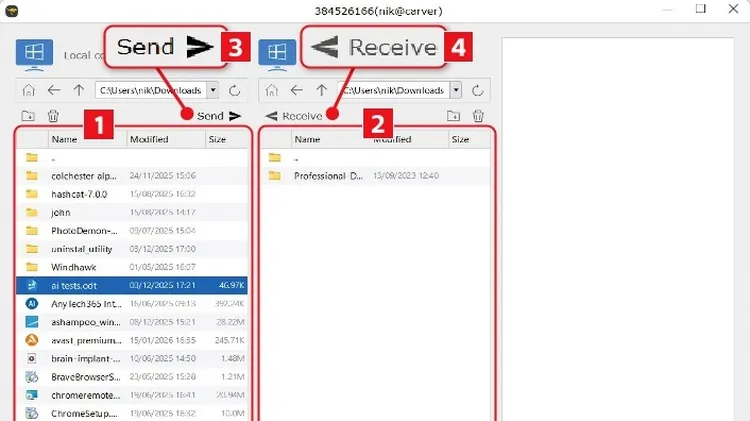
What you need: HopToDesk Time required: 60 minutes If you’re anything like us, you’ll spend most of your day using just one computer. However, there will be occasions when you need to work with anothe