Europe
Asia
Oceania
Americas
Africa
Our experts solve all your tech problems
PROBLEM OF THE FORTNI
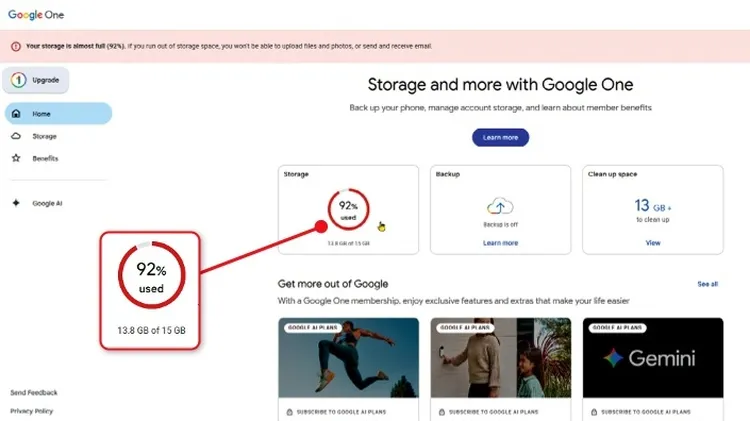
If you’re running out of space on your hard drive, you may be thinking of buying an SSD or upgrading your PC to a higher-capacity model. But with the soaring cost of memory pushing up the price of com
Shine a spotlight on the solutions to your most irritating Mac problems
Q I have a Lenovo Yoga laptop that includes a dedicated Copilot key. I don’t use Copilot and would like to reassign that button to open ChatGPT instead. Is this possible? Ian Mynott AYes, but it’s com
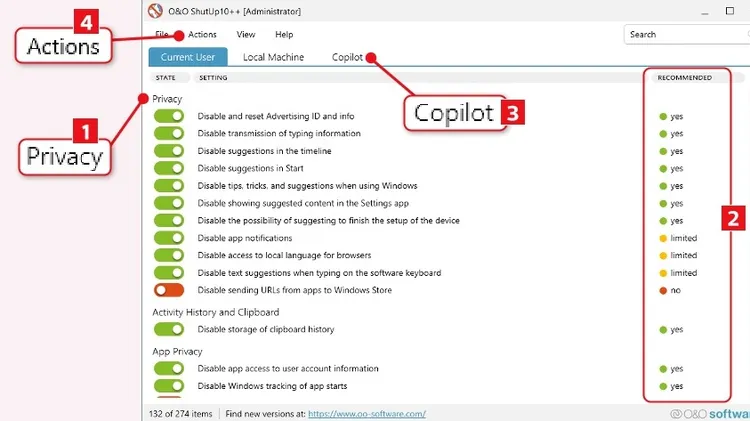
www.snipca.com/58052 What you need: Windows 10 or 11 O&O ShutUp10++ is a brilliant free tool for disabling Windows settings that compromise your privacy. This major update adds a host of new options t
We’re here to help solve your hardware issues