Europe
Asia
Oceania
Americas
Africa
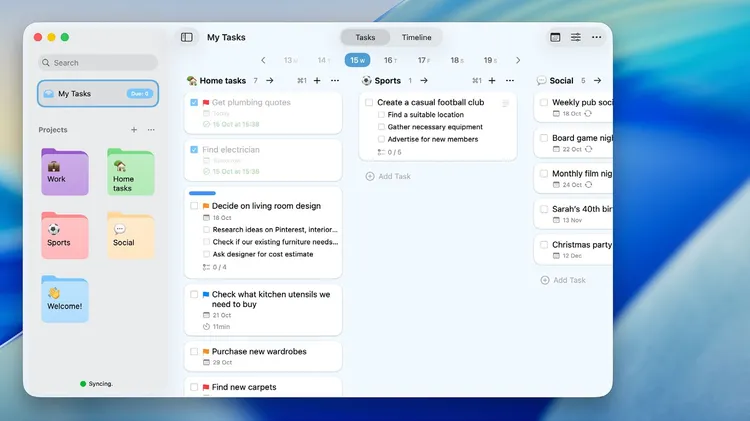
Discover a great way to manage all your ongoing projects in Remi
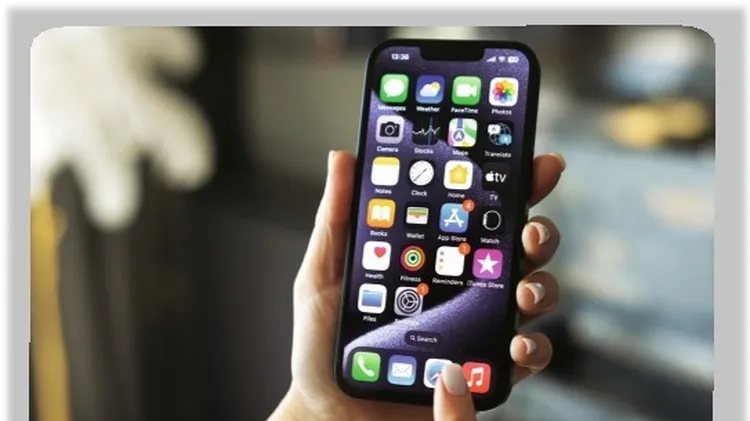
Your phone gets the blame for eating into your day… but Craig Grannell shows how you can harness its tracking smarts to turn yourself into a powerhouse of productivity
Get on top of your to-do list with the FirstSeed Tasks management app
If your diary is packed with so many plans that you are feeling overwhelmed rather than excited – when you look at it, then it’s time to tame it! We often say “yes” to things we don’t really want to g
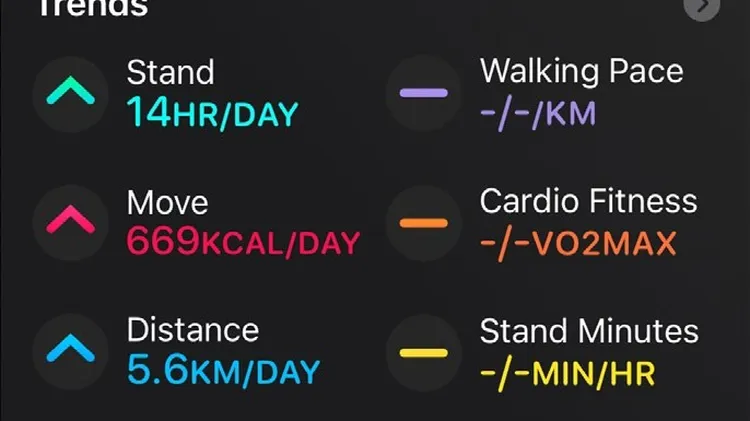
Apple’s devices are not just getting faster; in combination with a range of apps, they are also helping you to get fitter
Justifying your text makes multi-column or print-style layouts look neater. Version 25.8 of LibreOffice Writer, released in August, lets you set how loose or tight your justified text appears, improvi
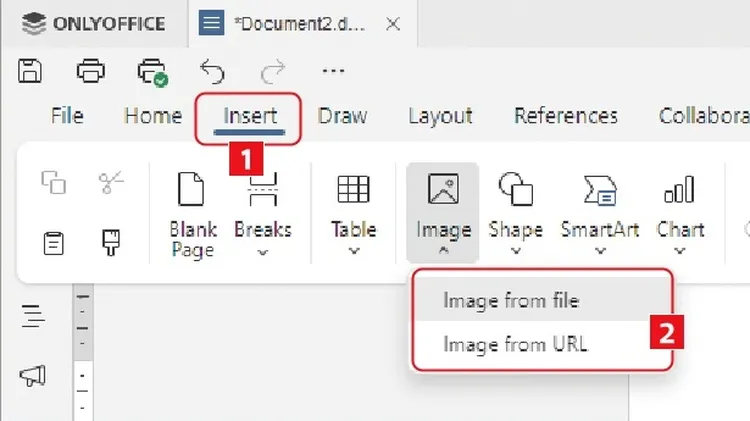
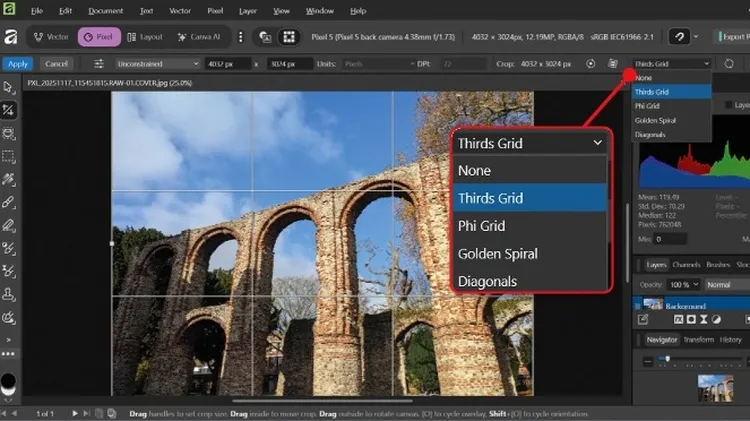
Something exciting happened at the end of October. Canva, best known for its online design and photo-editing tools, launched a single Affinity software suite, combining the image-editing, vector-graph